I love the Greeting Farm stamps and the challenge that I am completing is a card created that was inspired by a holiday memory. I chose to use one the Miss Anya Scarves since every Christmas time we are visiting an area that is very chilly and you need to bundle up warm. The Marker Pop blog is having a challenge to use dark, bold colors so I chose to colr the image with reds, blacks and dark browns. I used patterned paper from Echo Park called "For the Record 2" on the background of the card and I also punched out a strip using my Fiskars Scalloped Sentiment border punch. I used a strip of burgundy velvet ribbon trim that I bought from my local thrift shop. The button in the corner of the card came from an Etsy shop called "Buttons and Badges". The sentiment that I added to my card was created using my SP & Company stamp set called "Handmade Holiday Gift Tags". Thanks for looking.
I have always admired Greeting Farm stamps but just recently took the plunge and ordered some of them. They are adorable and so fun to paper piece. Their blog has many wonderful challenges and lots of inspiration. It was Double Take Tuesday yesterday and the challenge was to make a card using Red, Teal and Green. I chose to use one of my adorable Miss Anya Scarves stamps. I paper pieced her scarf with some Winter Wishes Echo Park patterned paper and colored the rest of the image in with my Copic markers. I also used some Enamel accents in the black to give a little dimension to the buttons on her coat and boots. The patterned paper that I used behind the girl image is from DCWV and the other patterned papers are also from the Winter Wishes Echo Park paper pad. I used my heart Martha Stewart punch to punch out a border strip in red cardstock to add across the bottom of the card. I used my SP&Company stamp set called "Handmade Holiday Gift Tags" to create the sentiment. I glued a strip of velvet teal ribbon in between the two patterned papers on the top of the card. Thanks for looking.
I love using DigiDarla's adorable images and they always have a fun challenge here each week. This week's challenge is "Holiday Cheer with embossing". I have a lot of Cuttlebug folders but a lot of time I forget or don't take the time to use them so I was glad to be reminded that embossing really gives your card some dimension and looks nice. I chose to use the snowflake embossing folder and then I wanted the snowflakes to stand out so I used my Versamagic Chalk ink in the Oasis Green color to rub across the embossed surface. I colored the adorable DigiDarla winter image with my Copic and Flex Letraset markers. I wanted to give my card some extra bling so I added some rhinestone snowflake stickers that I got from the Target $1 spot. I used my SP & Company stamp set called "Ultimate Sentiments II" for the card sentiment. Thanks for looking.
I have always admired the Greeting Farm Stamps but just recently started to purchase some for my own collection. They are so cute and very fun to paper piece. I love coffee so I had to have the Latte stamps. They have challenges quite often on their blog which you can find here. The challenge that I am entering is Non-Traditional Colors to make a Christmas card and you need to use a stamp that is at least 6 months old because it is supposed to be a Retro Christmas. I chose to use the adorable Cafe Ian. The patterned papers that I used were from the Echo Park This & that Christmas pack. I used some very fun mesh wire ribbon that I won from a RAK on Youtube. I add an October Afternoon flag that I also received in some Happy Mail recently along with a button that I received from JcPenneys on Black Friday because I thought it went perfectly with the card since it had a cup of cocoa on it!! This was a very fun card to create. I loved paper piecing his outfit with the same Echo Park patterned papers and it was GREAT to actually finish off the paper pad. Thanks for looking.
I so LOVE DigiDarla images to use and color. The challenge for this week is "Snow Fun with Bling". You can find the challenges here. I first took this adorable snowman image and colored it in. I decided that I wanted to make a shaker box so I created the window with some acetate and my Spellbinders A2 Matting Basics A and B. I used some fun hats and heart confetti that I had in my stash. It is actually supposed to be for weddings but I figured it was cute since the snowman always wears a hat. I then cut out a sheet of Echo Park This and That Christmas patterned paper with my Resplendent Rectangle Spellbinders. I then cut the center of it out and used it to frame the window. I added some red flowers from my stash along with some Doodlebug bling to one flower. I added some sequin trim that I received in a RAK around the edge of the frame. I used some white standard cardstock for the base and then I glued on a piece of script print from the Echo Park This and That Christmas paper pad. I then glued the shaker box on top of that. Thanks for looking
I love the Saturated Canary stamps and the digital images they offer. They also have challenges on their blog which you can find here. The challenge going on now is #32 and is "hot cocoa and marshmallows". I used the adorable "Latte" image that Krista drew. I colored her in with my Copic and Flex Letraset markers. I added some stickles to her scarf. My card base is a 5 X 8 card. I added 2 layers of cardstock and the top layer is patterned paper from the DCWV photo stack. I added part of a felt glitter snowflake and also a rectanular shaped paper doily that I cut in half. I added a crochet doily that I cut and recycled from a skirt. I add some purple and white arycllic flowers to the center and around the doily. I added a beautiful teal spray of flower underneath the doily. I popped the Latte image up with foam dots. Thanks for looking.
I love the digital images that you find at DigiDarla's store and there is a challenge each week here. I have missed a few weeks of completing them with having a bad back and the holidays but so glad I got to do this week's which is "A Child's Christmas". I loved this image of the painted pony and snowman and I figured it would be perfect because what child especially a girl doesn't love ponies. I colored the image in with my Copic and Flex Letraset markers. I added a piece of patterned paper from the My Mind's Eye "Stella and Rose" Gertie papers. I inked around the image with some Colorbok chalk ink. I added some white opal colored Liquid Pearls for the snow on the ground. I stamped the sentiment from an Imaginenise stamp set. Thanks for looking.
I have been following along with this blog's 25 days of Christmas. Damaris made a great sketch and wanted us to create a card using it and we were supposed to color in our image with Copics. I love using the Copic markers that I do have. I think they are the best and have tried to keep adding to my collection. This was such a fun sketch to follow. I used the Echo Park Winter Wishes patterned papers. The arrow that I created I stamped with a Close to my Heart stamp set. The image was one that I got as a freebie with the CardMaker magazine and I colored it in with my Copics and other markers. I added a rosette flower from the Pink Paislee Vintage Vogue collection and some felt glittery snowflakes that I got from the dollar store. The cardbase is one of those corrugated cardboard cards from Michaels. They are really fun to use and something just a little different. I created my own banner shape and stamped the sentiment using the SP&Company Handmade Holiday gift tags set.
I love using images from Digi Darla because they are so cute and easy to color. I used my Silhouette machine to cut out this cute polaroid frame with the words Thanks imbedded in it. I inked the frame with my Tim Holtz Peacock Feathers ink. I colored this cute DigiDarla image with my Copics, Flex Letraset. I used my Echo Park Winter Wishes Pattern Paper.
I have a fun blog to share with you of a very talented crafter and she is having an amazing giveaway with a TON of great and wonderful crafting items!!! Please go check out her blog here and leave a comment to win!!!
Sophie is an adorable digital image that was created by Sweet Nothings Stamp Company. They recently offered an adorable free Sophie digital image which I was lucky enough to get. I enjoyed completing their challenge using the image that I received. It was a neutral color theme challenge. I used all browns and only a hint of pink on her shirt and the heart of her purse. I colored Sophie using my Copic and Flex Letraset markers. My card base is the 5 X 5 Recollections corrugated cardboard. I used the Basic Grey Naturals patterned paper pack for this card. I used some amazing fun furry trim on the bottom of the card that I got from SaCrafters on zibbets. I used some pleated brown organza trim along the edge of the Sophie image. I made an organza flower and put a pearl ribbon slider in the center of it. I added a sentiment from the Sweet & Sassy Cocoa Mouse Treats stamp set. Thanks for looking.
I was introduced to Saturated Canary stamps recently by a Youtube friend and I love using digital stamps so was happy to see they had some digital images. I got a few of the wonderful freebies they had and then I just had to purchase some more of those adorable girls. The challenge this week was "Fairytales" it wasn't difficult to use a Saturated Canary image for this theme since so many of them look like fairytale princesses. I loved this image that I chose. I colored the Saturated Canary image up with my Copic and Flex Letraset markers and then I added some diamond lace stickles to give her dress some added sparkle. I added an adorable art tile piece that I received in a RAK from a Youtube giveaway. The patterned paper that I used was from Echo Park Everyday Eclectric. I used the label from the latest SP&Company monthly stamp set called "Handmade Holiday Gift Tags" and the sentiment that I stamped on the label was from the Bold Birthday Sentiments from SP&Company. I added a Prima flower that I got in a kit that I ordered on Etsy. I also added a piece of lace on the bottom that I purchased from Lavish Laces on Etsy. Thanks for looking.
I love the digital images you find at Sweet & Sassy and they have great challenges here. The latest one is a shaped card. I love the cocoa mouse images. I used my newest Spellbinder dies called "Resplendent Rectangles" to create a fun shaped card. I cut the Echo Park Winter Wishes patterned paper using another one of those dies to find on top of the card base. I colored in the Cocoa mouse image with my markers and stickled him up. I stamped out a tag from the SP&Company Handmade Holiday Gift tags stamp set and then I stamped the holiday sentiment from that same set onto the tag. Thanks for looking
I love my SP&Company monthly kit club and why you might ask is that, well it is because the price is great, stamps are great quality and I even get a new paper pack to use each month. If you haven't heard of this great company, please check them out here. They are having an amazing giveaway for the holidays. If you are a club member and purchase items from them in their store, they even give you a 15% discount and free shipping if you have it shipped with your monthly kit. Their customer service is amazing and products are wonderful.!!
There will be 25 days of Christmas starting on November 12th here. Be sure to check this site each day for fun holiday inspiration. There is some fun blog candy to win also. Good luck ladies.
I love using digital images on my cards and this site offers wonderful images from talented ladies. I have seen several people use these fun corrugated cardboard card bases from Recollections so I purchased some for myself. They are a 5 X 5 size. I used Bazzil Vintage Marketplace patterned paper for my design. The pink lined paper is 3 X 4 7/8 and teal geometric design is 2 X 4 7/8. I cut a 1 inch strip of the rose paper to add along the left hand side. I colored the fun teapot and teacup images with my Copic and Flex Letraset markers. I love the cute sentiments that were given to use with these images. I stamped out my latest SP&Company label stamp from the "Handmade Holiday Gift tags" set around the printed sentiment and cut it out. I added 3 heart rhinestones in the bottom right hand corner. Thanks for looking.
One of the wonderful aspects of being a part of the Tsunami Rose Designs team are the sneak peeks we get from all of Daisy’s marvelous designs. Beginning on November 1st, Tsunami Rose Designs will begin selling the first ever, Life Abloom Printable Journal. This is one stunning design you will not want to miss. When you purchase a printable from the Tsunami Rose Designs Shop, you are purchasing a high quality digital image, that is printable on any type of printer. What is really superb, once you purchase the design, you can use it as many times as you desire. I promise, the Life Abloom is one design you will not want to miss. You will find the new printable journal here . To add to the fun, the first 20 people to purchase the journal will get an additional free $5.00 to spend in the Tsunami Rose Designs Shop. /> There are several pages we would love for you to follow, two on Facebook, the wonderful Facebook TRD Group! and the New TRD Facebook Page, the third page is the Tsunami Rose Designs by Daisy Collins blog page. Following the blog will provide you with daily inspiration on how to use the wonderful printables from the shop.
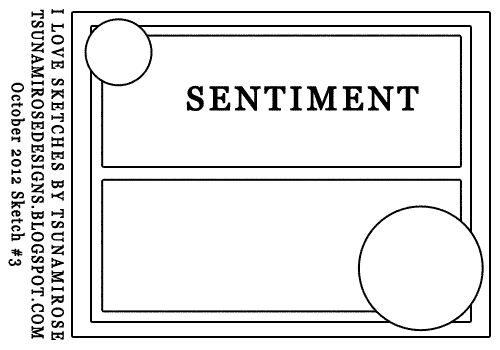
I used sketch #3 which is below to create my card:
I used the papers from this wonderful "Life Abloom printable journal kit" which you can find here.
I create the card for a challenge on Youtube so I made a video explaining my card which you will find below:
Please make sure you stop by and visit each of my Design Team Full Time Card Designers (All 30 days of November)
One of the wonderful aspects of being a part of the Tsunami Rose Designs team are the sneak peeks we get from all of Daisy’s marvelous designs. Beginning on November 1st, Tsunami Rose Designs will begin selling the first ever, Life Abloom Printable Journal. This is one stunning design you will not want to miss. When you purchase a printable from the Tsunami Rose Designs Shop, you are purchasing a high quality digital image, that is printable on any type of printer. What is really superb, once you purchase the design, you can use it as many times as you desire. I promise, the Life Abloom is one design you will not want to miss. You will find the new printable journal here . To add to the fun, the first 20 people to purchase the journal will get an additional free $5.00 to spend in the Tsunami Rose Designs Shop.
One of the wonderful aspects of being a part of the Tsunami Rose Designs team are the sneak peeks we get from all of Daisy’s marvelous designs. Beginning on November 1st, Tsunami Rose Designs will begin selling the first ever, Life Abloom Printable Journal. This is one stunning design you will not want to miss. When you purchase a printable from
the Tsunami Rose Designs Shop, you are purchasing a high quality digital image, that is printable on any type of printer. What is really superb, once you purchase the design, you can use it as many times as you desire. I promise, the Life Abloom is one design you will not want to miss. You will find the new printable journal here . To add to the fun, the first 20 people to purchase the journal will get an additional free $5.00 to spend in the Tsunami Rose Designs Shop.
I started out crafting by doing scrapbooking before I got married I was introduced to Creative Memories and started out on my wedding ablum. I got introduced to card making about 16 years ago and I love it more each day. I love using sketches to help me create cards because they take the guess work out of it and help me to create a more uniform card. I loved this first sketch for November 1st.
I created this card for a challenge on Youtube and you can find how I created it by watching this video.
Please make sure you stop by and visit each of my Design Team Full Time Card Designers (All 30 days of November)
Thank you for joining us from the Tsunami Rose Designs Shabby Chic Blog Hop Day 2! Thank you for joining us today. Today we will be showcasing the "Rose Paint Crackle" Papers in our sketch challenge of the day!
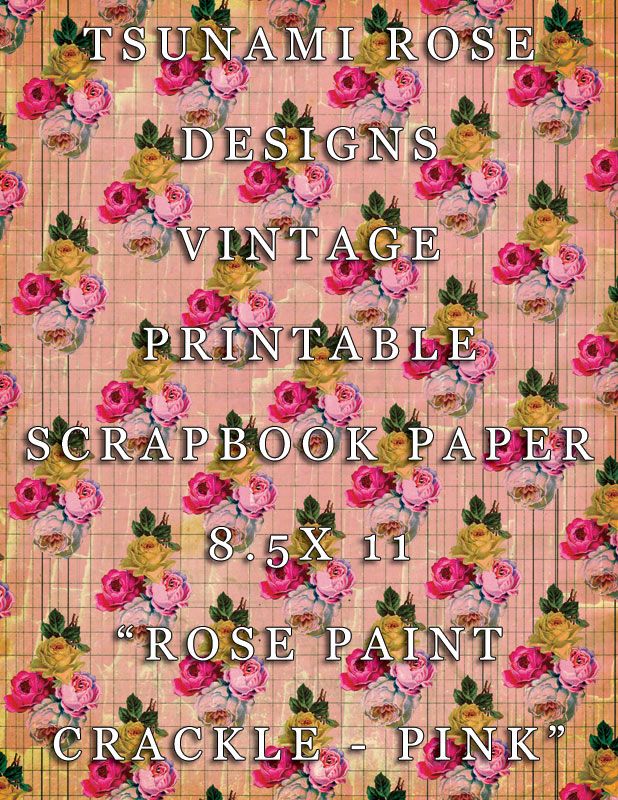
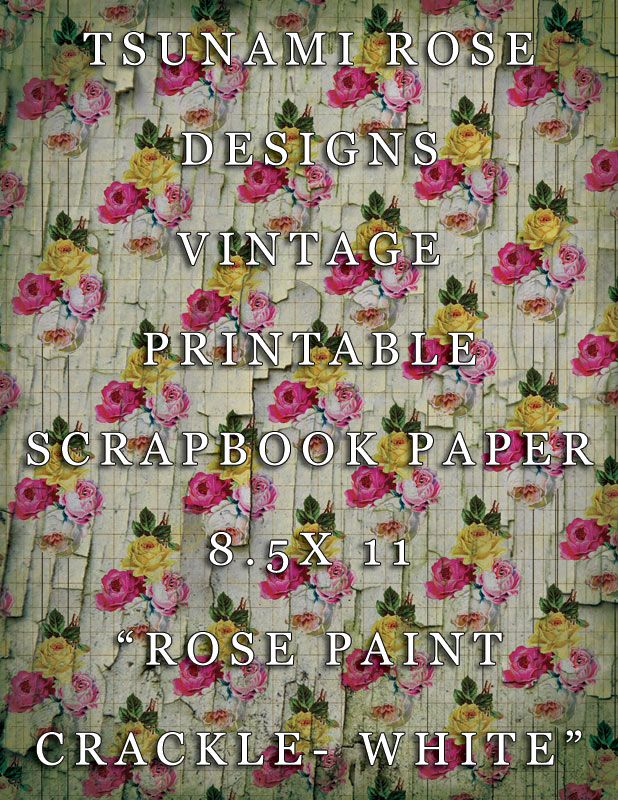
The papers that are available at the Tsunami Rose Designs Shop are all digital downloads that will be emailed to you. They all print at high resolution regardless of the printer used. The files are sent as PDF which is a standard for printing high resolution pictures, however JPGs and PNGs will be happily provided upon request. Printables give you more bang for your buck as you can print your favorite papers any time they fit your project!!
We also have a wonderful Facebook TRD Group! Join us and be inspired daily with a new sketch and a new card posted by the fabulous I Love Sketches by Tsunami Rose Design Team!
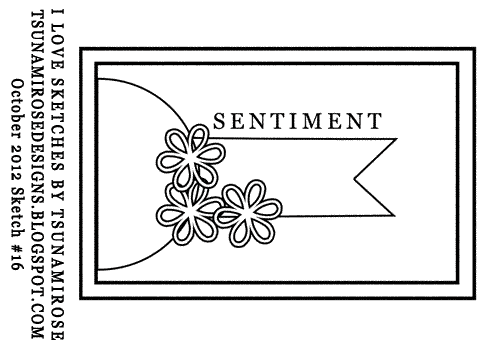
Today's sketch is #16
I love using sketches from TsunamiRoseDesigns to complete cards. I used a piece of fushia cardstock that was 10 X 5 folded in half. The patterned paper mat is from Bazzil Vintage Marketplace and is 4 X 4 3/4. I cut a half circle out of the Bazzil Vintage Marketplace paper and added it to the left side of the patterned paper mat. I cut a 2 inch banner out of the Rose Paint Crackle paper you can find here. I added some yellow cardstock to mat the banner and placed it behind the half circle. I used a large white flower from iamroses.com that I inked with some Colorbox Razzberry ink so it would match the card and then I added a ribbon flower in the center that I got from here. I added some pink and black paper flowers from Stampingscrapping in front of the banner. I took some Recollections white plastic flowers and colored them with my Copic RV14 and Flex Letraset M965 markers. When I finished coloring them I placed them on the paper flowers. I used my McGill Vintage Label punch to punch out a piece of cream cardstock that I stamped the sentiment "Thank You". The sentiment came from my SP&Company Ultimate Sentiments II stamp set. Thanks for looking.
The prize for is $25 to spend in the Tsunami Rose Designs Shop and a copy of October 2012 ILS by Tsunami Rose! To qualify you must become a follower of all participating blogs and leave a comment! I will pick a random commenter from each day from a random participating blog! The winners will be announced November 1st.
We have a treat for you! You can see a full preview @ the TRD facebook page! So make sure you check them out, and definetly get your copy of Tsunami Rose Designs first Printable Journal Kit, "Life Abloom."
Remember the "Life Abloom" Printable Journal Kit will be available November 1st (12:00am EST)! Also if you are among the first 20 customers to order you will receive $5 to spend in the Tsunami Rose Design Shop!
Thank you for joining us from the Tsunami Rose Designs Shabby Chic Blog Hop! Thank you for joining us today. Today and tomorrow we will be showcasing the "Rose Paint Crackle" Papers in our sketch challenge of the day!
The papers that are available at the Tsunami Rose Designs Shop are all digital downloads that will be emailed to you. They all print at high resolution regardless of the printer used. The files are sent as PDF which is a standard for printing high resolution pictures, however JPGs and PNGs will be happily provided upon request. Printables give you more bang for your buck as you can print your favorite papers any time they fit your project!!
We also have a wonderful Facebook TRD Group! Join us and be inspired daily with a new sketch and a new card posted by the fabulous I Love Sketches by Tsunami Rose Design Team!
Today's sketch is #3
I love the sketches that you can find at tsunamirosedesigns.blogspot.com. Today we were to use sketch #3 to complete a card. I used a piece of yellow cardstock that was 10 X 7 and folded it in half. I then cut a piece of fushia cardstock that was 6 3/4 X 4 1/2 to use as a mat. I chose to use a piece of patterned paper from Bazzil vintage Marketplace on the top and the bottom is a piece of wonderful paper from tsunamirosedesigns that is called "Rose Paint Crackle" and you can purchase it here. I used a Prima flower from the Whisper collection in the bottom right hand corner of the card. I placed a flower from StampingScrapping with a Recollections flower brad in the upper left hand corner of the card. I stamped the sentiment from my SP&Company Ultimate Sentiments II stamp set on some yellow cardstock that I distressed the edges using my Tim Holtz tea dye ink. I punched a butterfly border out of the yellow cardstock using my Martha Stewart punch. Thanks for looking.
The prize for is $25 to spend in the Tsunami Rose Designs Shop and a copy of October 2012 ILS by Tsunami Rose! To qualify you must become a follower of all participating blogs and leave a comment! I will pick a random commenter from each day from a random participating blog! The winners will be announced November 1st.
We have a treat for you! Here is a preview to all the pages that are in the journal as well as all the pockets and ephemera!
You can also view these @ TRD facebook page! So make sure you check them out, and definetly get your copy of Tsunami Rose Designs first Printable Journal Kit, "Life Abloom."
Remember the "Life Abloom" Printable Journal Kit will be available November 1st (12:00am EST)! Also if you are among the first 20 customers to order you will receive $5 to spend in the Tsunami Rose Design Shop!
I found a fun challenge from an email I received from here and decided to give it a try. I used a sketch from TsunamiRoseDesigns that was from May 2012 and was Sketch 16. I used some white cardstock that was 5 1/2 X 8 1/2 folded in half. I cut a piece of black cardstock to 3 3/4 X 5 1/4 and placed it down onto the white cardbase. I added two Recollections rhinestone stickers and an arcyllic flower from papermart.com to the upper right corner of the card. I cut a piece of "Paris girl" Carta Bella patterned paper to 2 3/4 X 3 and then I rounded the two right corners of it. I placed in on my card about 2 inches from the top left hand side. I then added a 1/4" strip of script patterned paper from the "Paris Girl" Carta Bella paper stack and also a border that I cut from that same paper pack which I placed under the fleur de lis paper. I added some pink Michaels ribbon top of the fleur de lis paper. I stamped a cute girl image from the Stampendous clear stamp set called "Love Buds" with my Menmento Tuxedo Black ink on some pearl white cardstock. I stamped the image again on some pink paper from the "Paris Girl" Carta Bella paper stack and paper pieced the heart. I used my EK Success real estate sign punch to punch out a piece of cream cardstock. I stamped in Colorbox Razzleberry ink the sentiment from SP&Company called "Bold Sentiments III". Thanks for looking.
As most of my blog readers know I am a BIG fan of DigiDarla and her wonderful images. They showed us how to make an explosion box here and challenged us to make one ourselves. I love a challenge so thought it would be fun to try. I used the tutorial and found it super easy to create. I used a piece of 12 X 12 bubblegum pink American Crafts paper for the bottom and then you need a 7 X 7 piece of the same paper to create the lid. I used some eyelet trim that I had purchased last year from Craigslist and some beaded flower pearl trim that I purchased online to go around the lid of the box. I added 3 Digi Darla images on the side of the boxes that I had colored with my Copics, Flex Letraset and Bic markers. The first image that I used was the Glorious Cupcakes that I colored in and the background is actually a recycled greeting card.
The next side and image that I used is called "Lil Duck and Daisy". I colored this in with my Copics, Flex Letraset and Bic Markers. I used some pretty pink polk dot paper from DCWV for the background.
I also used a freebie baloon image that I received from participating in their challenges on one side of my box. I enjoyed stamping some of them twice and popping them up on pop dots to give them more dimension.
Here is a view that shows how the box works and what it looks like partially open. Thanks DigiDarla for another great challenge!!!
I learned about a new challenge blog for layouts from a blog I recently started following. I thought it would be fun to enter the challenge which was a "Photo Inspiration" challenge. You can see the photo here. The parts of the photo that stood out to me were the bright green and turquoise colors. I also chose to add a banner because of the way the paper lanterns were hanging. I started with a piece of moss colored American Crafts cardstock that was 12 X 12. I added a piece of patterned paper from my stash that was cut to 11 X 11. I then cut a piece of teal patterned paper from my stash to 5 3/4 X 4 1/2 for a photo mat for the one picture. I added some Colorbok "Truffle" paper punchouts under one of the photos in the top left and in the center of all the photos. I stamped some hearts from the Stamps of Life "Hearts2love" stamp set in the top left corner and the bottom right corner is a frame from that set. I wil use this as a journaling area. I also stamped hearts from this set and added them to the bottom of my lace and ribbon trim! The inks that I used to stamp these images were Tim Holtz distress ink in Seedless Preserves and Peacock Feathers. I also used some stamps from the Lawn Fawn set "Say Cheese".
I decided that because the paper lanterns in the photo were hanging that I wanted to create a banner for my page in the upper right hand corner. I used the SP&Company stamp set called "Stitchery Doo Banners for the penants and the SP&Company set called "Mix and Match Kids" for the words on the penants. I used some string that I received from a friend on a package. I used two purple flowers from my stash on the end of the banner with some Recollections pearls in the center of them. Thanks for looking.
I love using digital images on my cards and I have found this fun group that offers the best free digital images here with the requirement that you make a project and post it. The image is from Digistamps4joy and they have a challenge this week on their blog that is "Anything goes" so I am entering their challenge as well.
I chose to use a kraft cardstock (7 X 10) folded in half. I chose some patterned paper (slightly smaller) from the Echo Park "This and That Christmas" pack to add on top of the cardstock. I then took a smaller piece of light blue cardstock and ran it through my Cuttlebug with the swiss dot folder. I colored the image with my Copic and Flex Letraset markers. I decided to try something that I have never done before and that was to print out 2 of the same image and then pop up parts of the design using Pop Dots. I chose to do that with one of the mushroom tops and 2 of the Daisy flowers.
I cut out one of my Spellbinders Francy Framed Tags 2 dies in glitter yellow cardstock and plain yellow which I stamped the sentiment on and pop dotted it up onto the glitter paper. I added some Queen and Company pearls to the bottom of the sentiment.
I added some washi tape under the sentiment along with a piece of cardstock that I punched out using my EK Success Scroll border punch. Thanks for looking
I love the fun digital images that Digi Darla offers and they have a great challenge here each week. This week the challenge is ABC's. I used a piece of kraft cardstock 5 1/2 X 8 1/2 which I folded in half. I then added a piece of patterned paper (slightly smaller) from Echo Park "For the Record 2" to the front of the folded card. I used my Spellbinders Label 22 die to cut out the digital image. While the die was still around my image I used my Tim Holtz stormy sky with the blender tool to give the background some color. I colored my image in using Copics, Letraset Flex markers and Bic. I love how you can use so many different markers to blend together and get the effect you desire. I added an arrow which I stamped onto patterned paper from the Stamps of Life "Cars2drive" stamp set which is very masculine in nature. Hope you enjoyed my card.
I enjoy scrapbooking but seem to be a year behind in photos right now. I love a good challenge which helps me complete my pages. I enjoy finding them online and here is a great place to find a wonderful monthly challenge. This month the challenge was to use 12 buttons. I do LOVE buttons and have a wonderful stash of them that I seem to hoard and use occasionally so this was a perfect challenge. I looked through my photos that need to be made into layouts and found just the one that I thought would work with some buttons.
I chose a light blue cardstock (12 X 12) from my stash to compliment the blue in the photo. I had a beautiful piece of patterned paper from Websters Pages that had some wonderful clocks on it and script writing. I chose to fussy cut the clocks out and paste them in the upper left corner. I placed a green button in the center of one of the clocks. I used the script part of the paper (7 1/2 X 6 3/4) as a backdrop for my photo that I matted on brown cardstock (6 1/4 X 4 5/8). I also used a piece of DCWV "Linen Closet" stack to punch borders using my Martha Stewart Scroll Heart punch and EK Success scroll and hearts punch and then I adhered them underneath the script paper.
I took a piece of eyelet trim that I bought from Craigslist last year and I sprayed it with my Lindy Stamp Gang Starburst Stains in Creme Brulee Cream and Dark Chocolate Truffle. I then adhered the eyelet with hot glue to the bottom of my page as a border. I added some brown and aqua trim that I bought at Hobby Lobby. I also adhered 5 aqua buttons to the trim using my hot glue gun. I used some aqua and pink paper flowers from my stash with buttons (3) in the center and placed them in the lower left corner. The gold fan that I placed by the flowers is actually a button. I added an American Crafts tag with a button covering up the hole. I added a couple of white and cream flowers and placed a vintage button in the center of the cream flower which I added underneath the tag.
I used a ClubScrap Alphabet stamp set that I found at my local Goodwill store and stamped it out to spell the title "Family" using my Tim Holtz distress ink in Peacock Feathers. Thanks for looking.
I love the digital images that you can find at DigiDarla. They have a wonderful challenge each week and sometimes their are prizes or you receive a wonderful image free for playing along. If you LOVE digital images you really should check them out. This week the challenge was "Fancy Folds" and I loved the "Cascading card" that Lisa on the design team made so I followed her link and tried one of them for myself. I used a really cute little boy from DigiDarla. Thanks for looking.
I always LOVE this time of month when the SP&Company releases their new stamp sets. I am a member of their stamping monthly club and LOVE the new Echo Park paper pad that I get every month along with a new stamp set. When they do their monthly release they always have a challenge and this month the color is "Black". I used the fun "Mini Card Creations I" set to stamp the border and the saying "Be Happy". I then used a butterfly set from my stash to stamp out and color in with my Distress markers. I used some DCWV "Black Current" paper stack and some black cardstock. I handmade a flower out of some lace that I recently found at my local Goodwill store. Thanks for looking.
If you LOVE Webster Pages as much as I do you will want to check out their newest addition called Best Friends. You can find all the information on this great collection here. I love the trims and the beautiful cameos in this collection. I hope you enjoying learning about this new collection as much as I did. Thanks for looking.
The digital challenge this week here is a Tic-Tac-Toe board and you need to pick at least three of the things to use on your card. I love their adorable little mouse images. I chose to use the one in the cocoa cup with the marshmellows and candy cane except I decided to cut of the candy cane because the red/white wouldn't fit in with the colors I used. I used the DCWV Linen Clost paper stack and my adorable sketch came from tsunamirosedesigns.blogspot.com. I chose to emboss, use a die-cut and button. I used my Spellbinder die called "Teardrop Circles" for the scalloped background. I cut a banner out of the paper and then placed the adorable mouse image on top. I used a Fiskar stamp set for the sentiment and punched it out with my Fiskar scalloped oval squeeze punch. I added a button and some dew drops by the sentiment. TFL
If you LOVE digital images you really should check out this cute shop to buy adorble images. They are called Sweet'n'Sassy and they offer challenges on a regular basis. I love using digital images so I like their digital challenge blog. The challenge for this week is "Hip to be Square". I decided to use the adorable "Fenton" frog image. I colored him in with my new Letraset Flex markers that I am LOVING. They have brush tips and are very similar to the Copics except they are a whole lot cheaper. I used patterned paper from the Echo Park "This & That Christmas" paper stack. I punched out the squares using my scalloped EK Success punch and my square Fiskar squeeze punch. It was a very fun card to create. I used my new Spellbinder tag dies for the sentiment. I added some bling that I had in my stash that was purchased at Tuesday Morning. Thanks for looking.
The challenge this week at DigiDarla is "add a little sunshine" and you need to add some red, oranges and/or yellows to your projects. Here is the card I created using this adorable flower image from DigiDarla. I used the Echco Park "This & That Christmas" patterned papers. I used my Spellbinders Label 5 and 8 to cut out around the image and the background papers. I used my Fiskar Upper Crest border punch to add a punched border along the bottom. The sentiment is from a Hero Arts Friends clear stamp set along with the butterflies. I used a Dress It Up butterfly button to embellish the flower image. I used some washi tape and orange floral decorative tape under the label and above the border. TFL
I love using digital images and this site has such fun challenges with adorable images that are ongoing. Please check them out and join in the fun. I loved this particular image because this last year was my daughters first time to raise a pig for our county fair. I will enjoy using this fun image again on projects and especially when I make up the scrapbook pages for her adorable pigs. I used patterned paper from the DCWV "Linen Closet" stack and I used one of my EK Success "Real Estate sign" to punch out just a small corner that I added on opposite corners after inking with some distress ink. I loved this cute heart scalloped border punch and thought it would be cute under the image and as part of the dirt. I used a label die and I printed out the sentiment from my computer. Thanks for looking.
This is an announcement for all my crafting friends. Please go check out this blog if you want a chance to win some great new stamp sets and inks. She is having this GREAT giveaway in honor of reaching 600+ subscribers to her blog. She also has a Youtube channel called CandysCraftCorner1 on Youtube so check her out there also. Thanks and Good luck on winning!!!
The challenge on DigiDarla this week is "Circles and Scallops". I love both of them so it wasn't hard to complete this challenge. I used some patterned paper from Making Memories. The polka dot paper went well with the circle theme. I cut a circle out of the polka dot paper using my Fiskars circle cutter. I used my Fiskars border punch that has scallops and circles to create borders for the top and bottom of the card. I love this adorable little boy image. My sentiment came from a Stamps of Life exclusive stamp set that I got when I was a stamp club member. I used my Fiskars scalloped circle squeeze punch to punch out some patterned paper that I used to stamp my sentiment on. Thanks for looking.